7-Inch Touchscreen Keypads can support up to 16 cameras and 8 doorbells. A network connection is required to enable and view video devices on a keypad. To enable video devices on a 7-Inch Touchscreen Keypad, complete the following steps.
Cameras
Enable VUE Cameras
Complete the following steps to enable a VUE 5MP Camera to appear on a 7-Inch Touchscreen Keypad:
-
Log in to Dealer Admin (dealer.securecomwireless.com).
-
Go to Customers and select the System Name you want the doorbell to be associated with.
-
At the top of the screen, select Edit.
-
Scroll down to Virtual Keypad (App & Website) and ensure the Standard or Virtual Keypad Access plan is selected.
%20plans.png?cb=d933edd96fbbd1947f35f7702df29955)
-
Scroll down to Video. At VUE Camera, select the checkbox to enable the camera features.
-
In the Number of Cameras drop-down menu, select how many cameras you want to add to the system. You can add up to 16 cameras per system.
SCREENSHOT
-
If you want to enable Monitoring Center Video Verification for your cameras or NVRs, select the Monitoring Center Video Verification checkbox.

-
Select Save at the top or bottom of the screen.
-
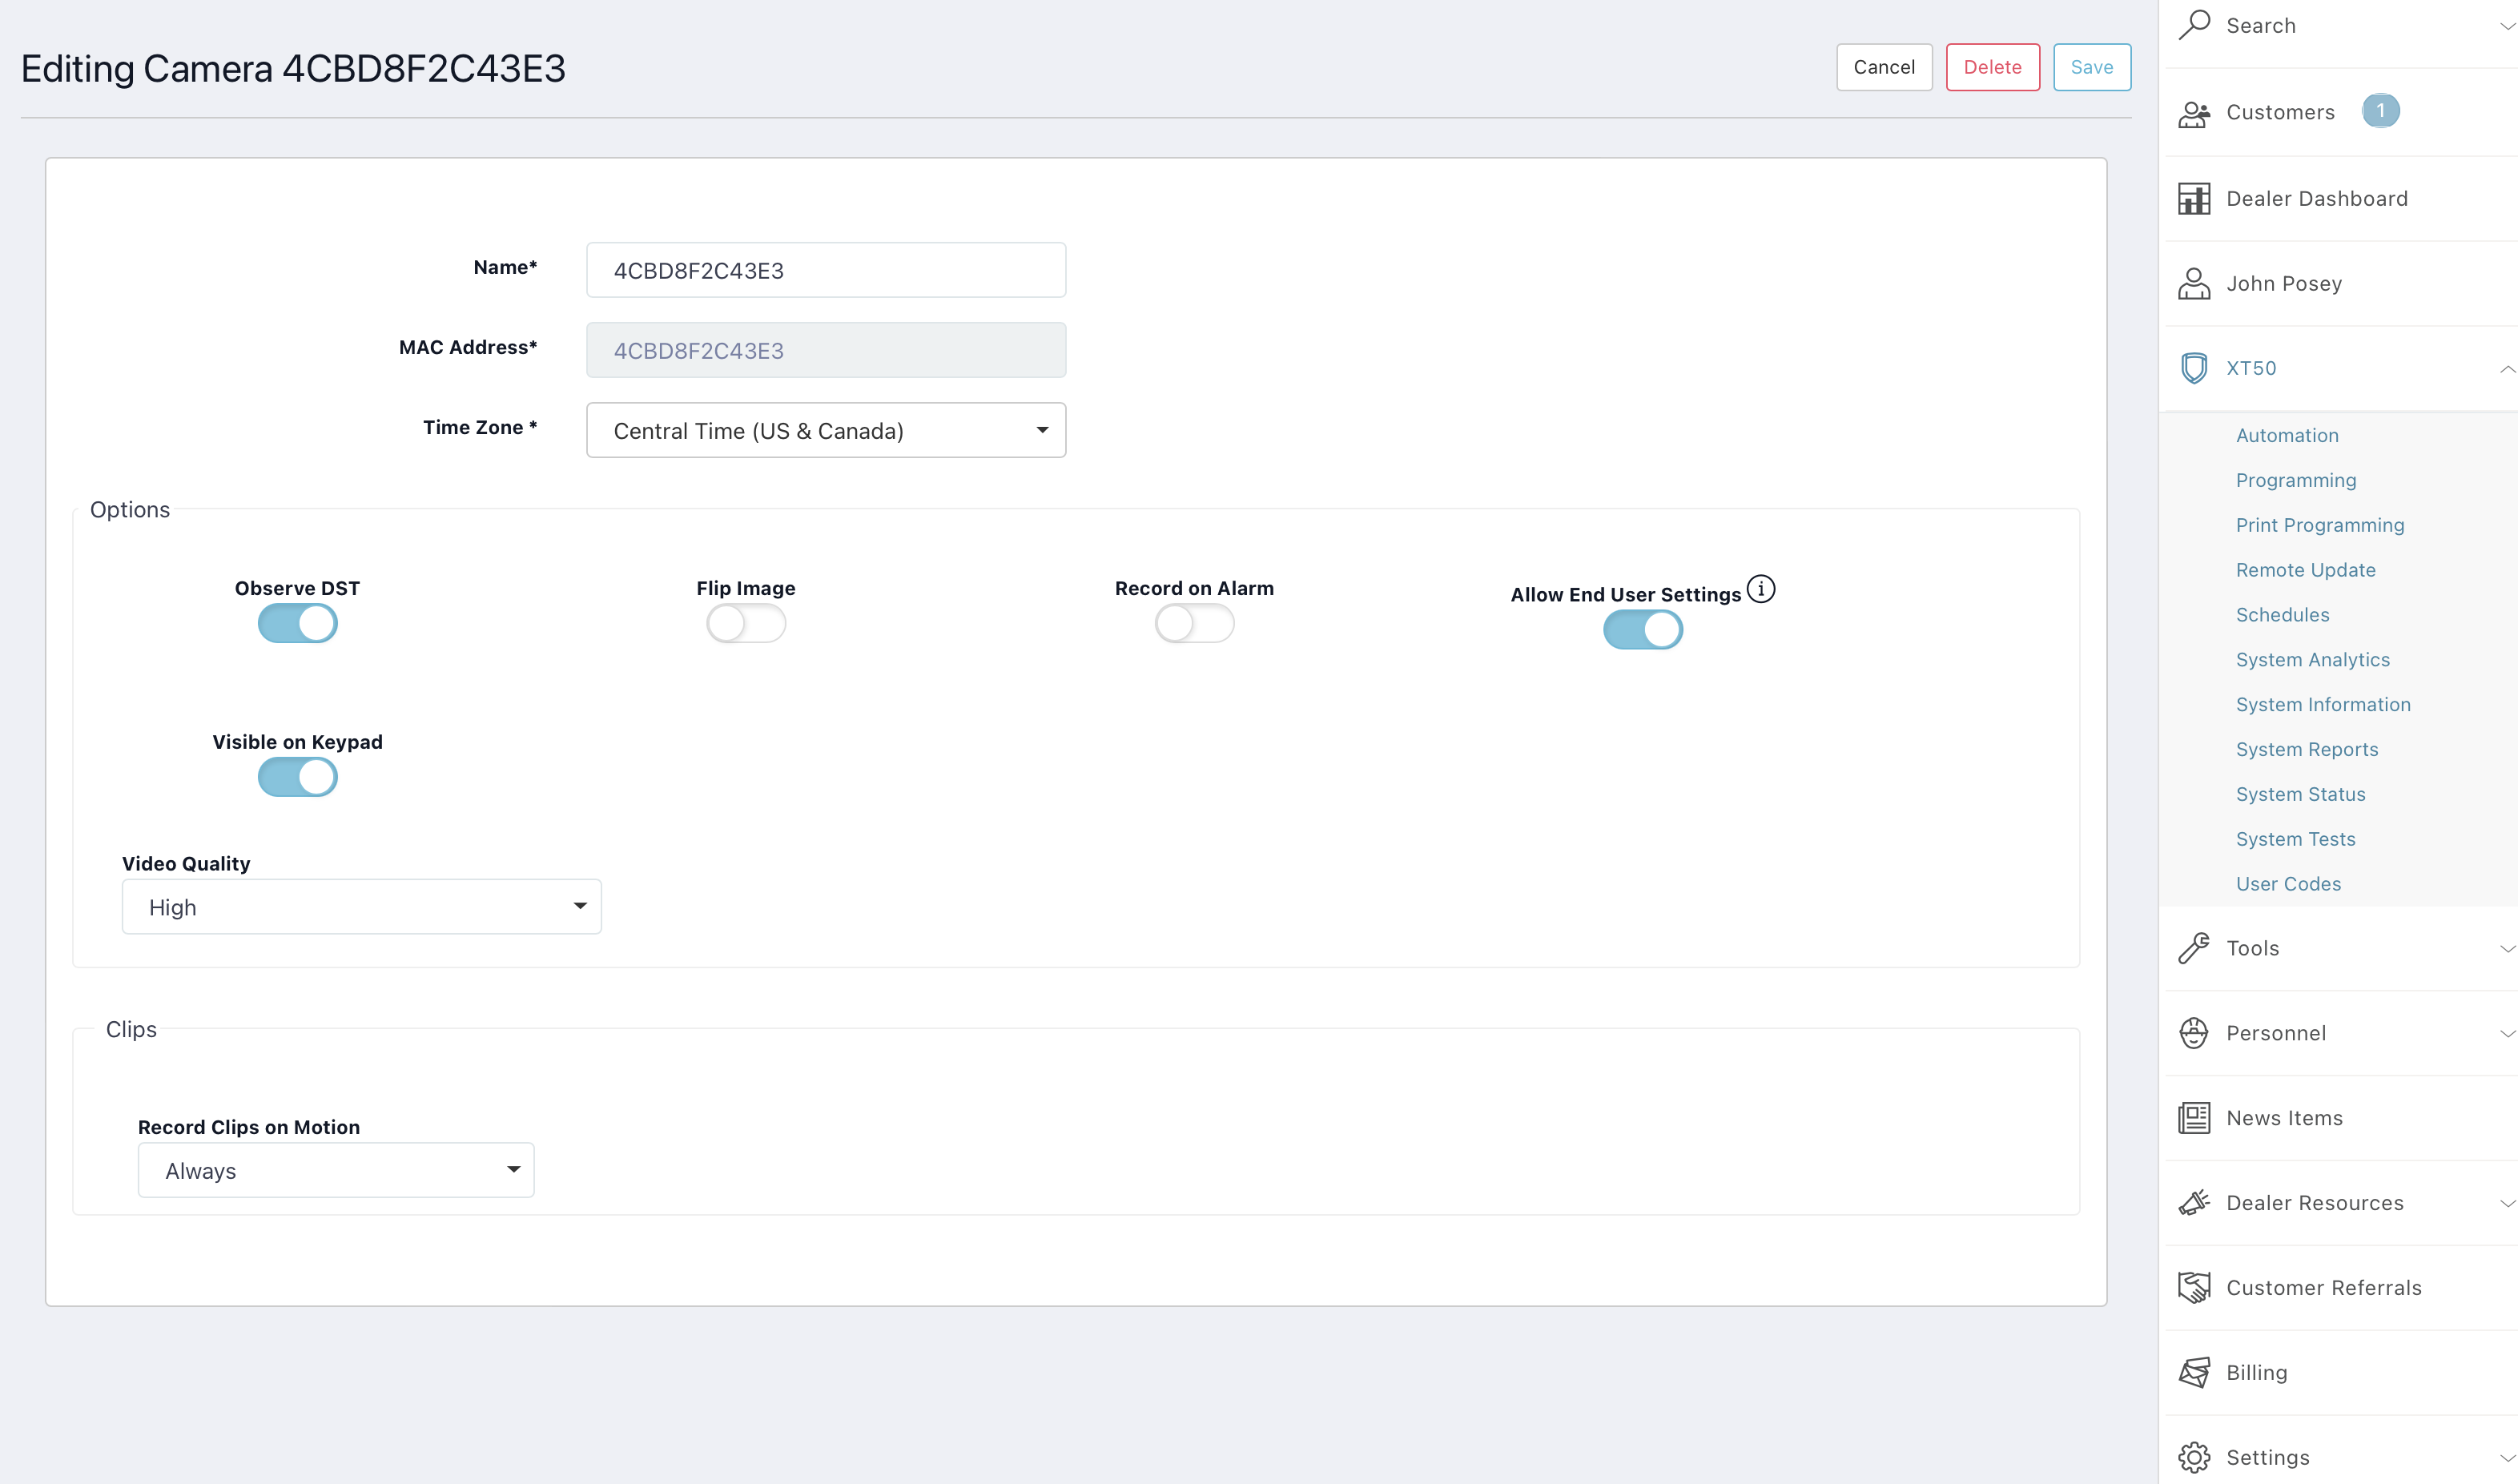
Activate and configure the VUE Cameras following the instructions in the VUE Camera Help File. For VUE Cameras to appear in the keypad Camera List, ensure Visible on Keypad is toggled ON while configuring the Camera Settings.
Enable Legacy Cameras
Complete the following steps to enable a Legacy Camera (V-4000, V-5000, and V-6000 Series) to appear on a 7-Inch Touchscreen Keypad:
-
Log in to Dealer Admin (dealer.securecomwireless.com).
-
Go to Customers and select the System Name you want the doorbell to be associated with.
-
At the top of the screen, select Edit.
-
Scroll down to Virtual Keypad (App & Website) and ensure the Standard or Virtual Keypad Access plan is selected.
-
Scroll down to Video. At Legacy Cameras & NVR, select the checkbox to enable the camera features.
-
In the Number of Cameras drop-down menu, select how many cameras you want to add to the system. You can add up to 16 cameras per system.

-
If you want to enable Monitoring Center Video Verification for your cameras or NVRs, select the Monitoring Center Video Verification checkbox.
-
Select Save at the top or bottom of the screen.
-
Activate and configure the Legacy Cameras following the instructions in Dealer Admin Help File: Enable Video Devices. For Legacy Cameras to appear in the keypad Camera List, ensure Visible on Keypad is toggled ON while configuring the Camera Settings.
View Cameras
Live View
Note: In Dealer Admin, the Visible on Keypad option needs to be toggled ON for each camera to be added to the Camera List.
This function allows you to see all system cameras added in Dealer Admin, including cameras associated to an XV Gateway™.
-
In the Carousel menu, select Video.
-
Select a camera to display on the keypad.
-
Swipe the screen left to go to the next camera. Swipe the screen right to go to the previous camera. Pinch to zoom.
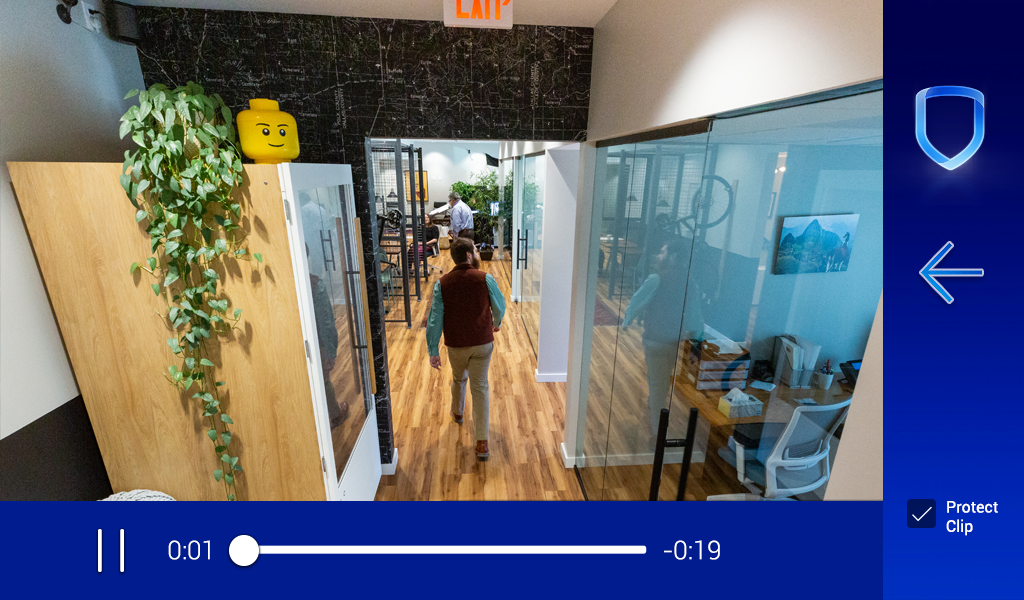
Recorded View
Note: Video clips are saved in Virtual Keypad and not stored locally on the keypad.
This function allows you to access recorded video events.
-
In the Carousel menu, select Video.
-
Select a camera to display on the keypad.
-
Press the Video Clips button in the bottom right corner of the keypad screen.
-
Toggle the play/pause button to play or pause the clip.
-
Swipe the screen left to go to the next clip. Swipe the screen right to go to the previous clip. Pinch to zoom.
-
Press Protect Clip in the bottom right corner of the keypad screen to prevent the clip from being erased.
.png?cb=cf13ed750d98244194916dedb14c9227)
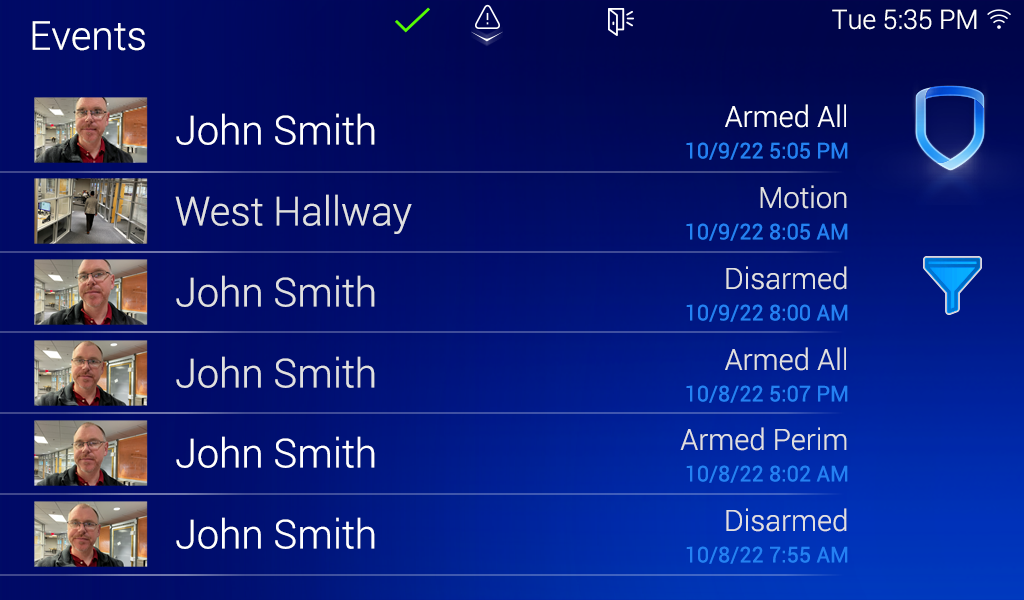
Recorded Clips
Note: Video clips are saved in Virtual Keypad and not stored locally on the keypad.
This function allows you to access recorded video events through the events list on the keypad.
-
In the Carousel menu, select Events.
-
Select a row to select an event.
-
Swipe the screen left to go to the next event. Swipe the screen right to go to the previous event. Pinch to zoom.
.PNG?cb=e1d1e3e618e833d4ecef6c7dcbba6d60)
VUE Camera Additional Features
V-7051-BD Bullet Camera and
V-7051-TD Turret Cameras
-
In the Carousel Menu, select Video.
-
Select a camera to display on the keypad.
-
A live view of the camera appears. The White Light, Alert Light, Call, and Talk buttons display. See the table below for more information.
V-7051-D Dome Cameras
-
In the Carousel Menu, select Video.
-
Select a camera to display on the keypad.
-
A live view of the camera appears. The White Light and Alert Light buttons display. See the table below for more information.
SCREENSHOTS NEEDED
|
Button |
Disabled/OFF |
Enabled/ON |
Description |
|---|---|---|---|
|
White Light |

|

|
Press to turn on and off the white light on the VUE camera. |
|
Alert Light |

|

|
Press to turn on and off the red light on the VUE camera. |
|
Call |

|

|
Press and hold to project your voice through the camera’s speaker. Note: This feature is a half-duplex system, meaning that audio can travel both ways, but not at the same time. When you press Call, audio picked up by the camera microphone mutes automatically until Call is turned off again. |
|
Talk |

|

|
Press to turn the microphone on the camera on and off. A slider will appear, allowing you to toggle the volume of the microphone. |
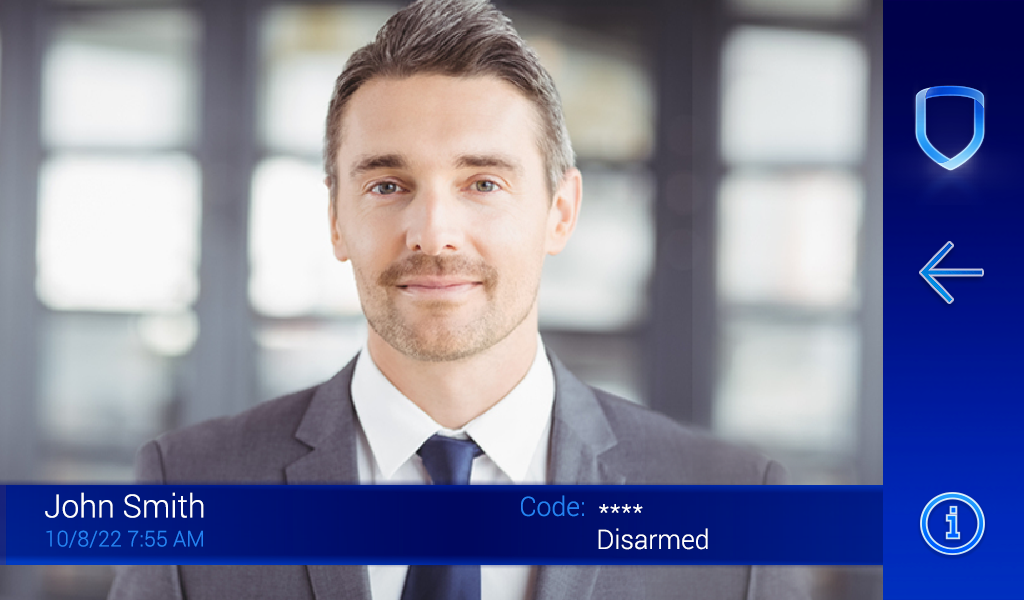
Snapshot Verification Events
This function allows you to see a snapshot from the keypad front facing camera during an arming or disarming event. You can view snapshot events in Events on the keypad or through Event History on Virtual Keypad.
-
In the Carousel menu, select Events.
-
Select a row to select an event.
-
Swipe the screen left to go to the next event. Swipe the screen right to go to the previous event. Select the Info icon to display the Event Information Banner.
-
Select the Filter icon to display the Filter Events menu. Use the Filter By section on the left side of the screen to change how the events are categorized. The categories include Type, Camera, Dates, and Areas. Select Apply to activate the filter in the Events List. A checkmark appears next to applied filters.
-
After a filter is activated in the Events List, a horizontally scrollable banner displays the applied filters.
-
To remove all filters, select Clear at the bottom of the screen.
-
To remove an individual filter, navigate back to the Filter Events menu and select the filter you want to remove. The checkmark disappears when a filter is deselected.
-
Video Doorbells
Note: Video doorbell capabilities are only available for the DMP Model V-4061DB Video Doorbell or DMP VUE Video Doorbell. To use a VUE Video Doorbell on the 7-Inch Touchscreen Keypad, update your firmware to Version 186.1.0.1401 or greater.
Enable a VUE Video Doorbell
Complete the following steps to enable a VUE Video Doorbell to appear on a 7-Inch Touchscreen Keypad:
-
Log in to Dealer Admin (dealer.securecomwireless.com).
-
Go to Customers and select the System Name you want the doorbell to be associated with.
-
At the top of the screen, select Edit.
-
Scroll down to Virtual Keypad (App & Website) and ensure the Standard or Virtual Keypad Access plan is selected.
-
Scroll down to Video. At VUE Video Doorbell, select the checkbox to enable video doorbell features.
-
In the Number of Doorbells drop-down menu, select how many doorbells you want to add to the system. You can add up to 8 doorbells per system.

-
Select Save at the top or bottom of the screen.
-
Activate and configure the VUE Doorbell following the instructions in the Dealer Admin Help File: Set up VUE Video Doorbell. For VUE Video Doorbells to appear in the keypad Doorbell List, ensure Visible on Keypad is toggled ON while configuring the settings.
Enable a Legacy Video Doorbell
Complete the following steps to enable a Legacy Video Doorbell (V-4061DB) to appear on a 7-Inch Touchscreen Keypad:
-
Log in to Dealer Admin (dealer.securecomwireless.com).
-
Go to Customers and select the System Name you want the doorbell to be associated with.
-
At the top of the screen, select Edit.
-
Scroll down to Virtual Keypad (App & Website) and ensure the Standard or Virtual Keypad Access plan is selected.
-
Scroll down to Video. At Legacy Video Doorbell, select the checkbox to enable video doorbell features.
-
In the Number of Doorbells drop-down menu, select how many doorbells you want to add to the system. You can add up to 8 doorbells per system.

-
Select Save at the top or bottom of the screen.
-
Activate and configure the VUE Doorbell following the instructions in the V-4061DB Installation Guide (LT-2524). Once the doorbell is activated and on the same network as the 7-Inch Touchscreen Keypad, the doorbell automatically appears in the keypad Doorbell List.
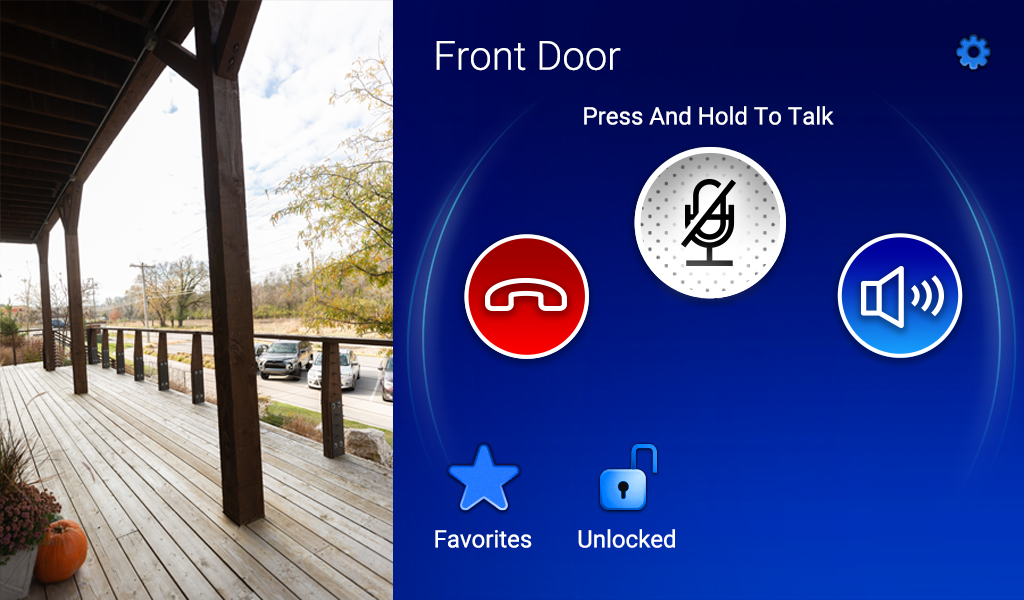
View Video Doorbells
Note: In Dealer Admin, the Visible on Keypad option needs to be toggled ON in Camera Settings for VUE Video Doorbells to be added to the Camera List.
For One Doorbell
-
In the Carousel menu, select Video Doorbell.
-
The doorbell screen appears. The following buttons display automatically:
-
Press and hold the Talk button to talk through the keypad.
-
Select the Speaker button to mute and unmute the incoming audio.
-
Select the End button to return to the Home Screen.
-
-
By selecting the gear icon in the corner, you can enable the following:
-
Enable the Favorites button to view Z-Wave Favorites on the doorbell screen.
-
Enable the Unlocked/Locked button to set the status of the door on the doorbell screen.
-
For Multiple Doorbells
-
In the Carousel menu, select Video Doorbell.
-
A list of doorbells is displayed. Select a doorbell to interact with it.
-
The doorbell screen appears. The following buttons display automatically:
-
Press and hold the Talk button to talk through the keypad.
-
Select the Speaker button to mute and unmute the incoming audio.
-
Select the End button to return to the Home Screen.
-
-
By selecting the gear icon in the corner, you can enable the following:
-
Enable the Favorites button to view Z-Wave Favorites on the doorbell screen.
-
Enable the Unlocked/Locked button to set the status of the door on the doorbell screen.
-
-
While on the doorbell screen, swipe to view the next or previous doorbell from the list.
.png?cb=005a3181ae13b922e701f2f0bb7ea8f2)
Enable Z-Wave Favorites on the Doorbell Screen
To enable Z-Wave Favorites, complete the following:
-
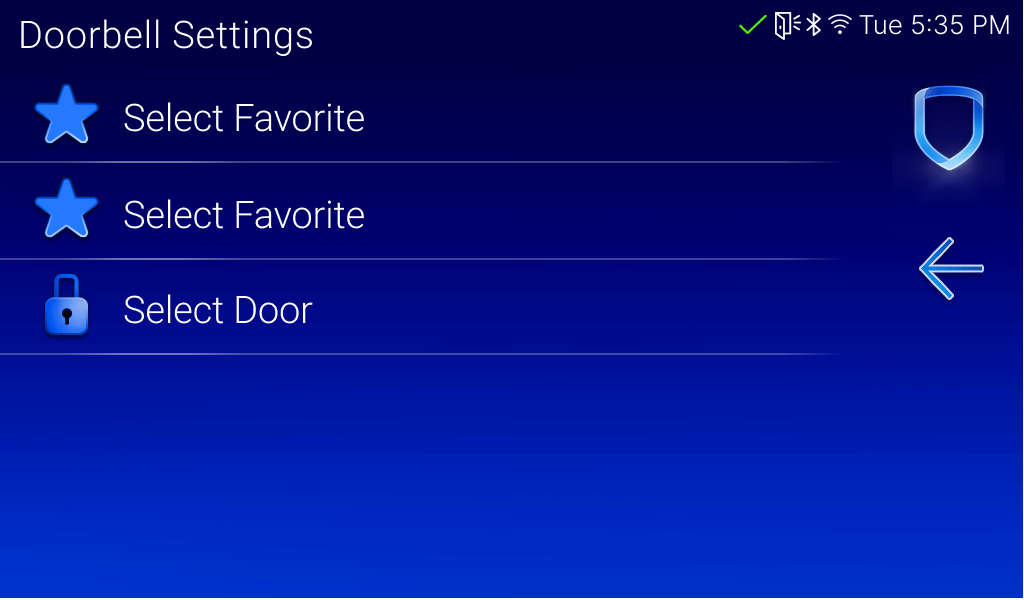
Select the gear icon. Doorbell Settings displays.
-
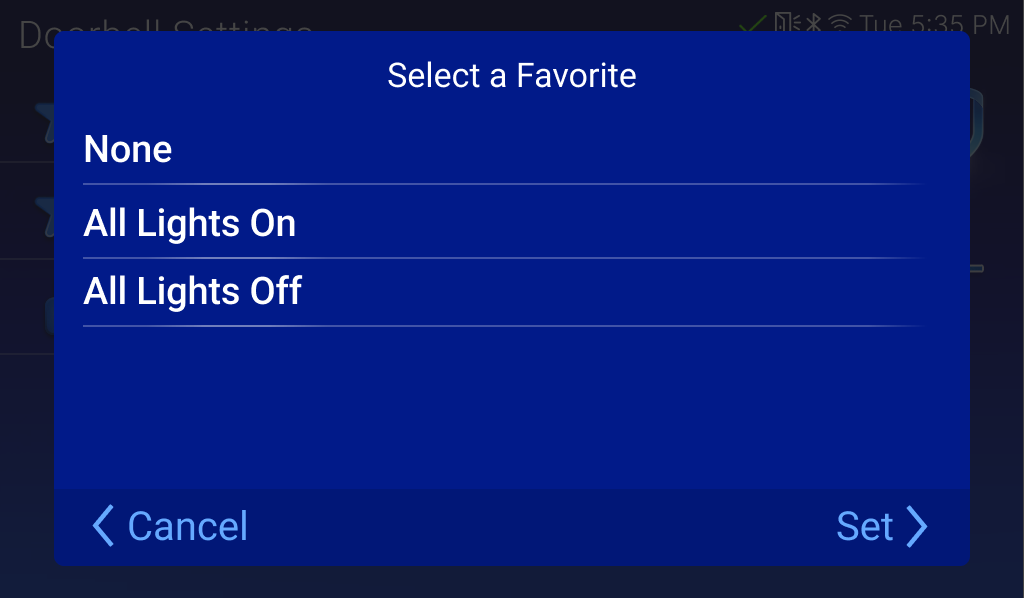
Select Select Favorite. The Select a Favorite pop-up appears, displaying a list of Z-Wave favorites.
-
Select the Z-Wave favorites you want to access from the Favorites button on the doorbell screen.
-
Select Set. Repeat for the second Select Favorite, if desired.
-
Select the back arrow to return to the doorbell screen.
Enable Door Lock on the Doorbell Screen
To enable Z-Wave Favorites, complete the following:
-
Select the gear icon. Doorbell Settings displays.
-
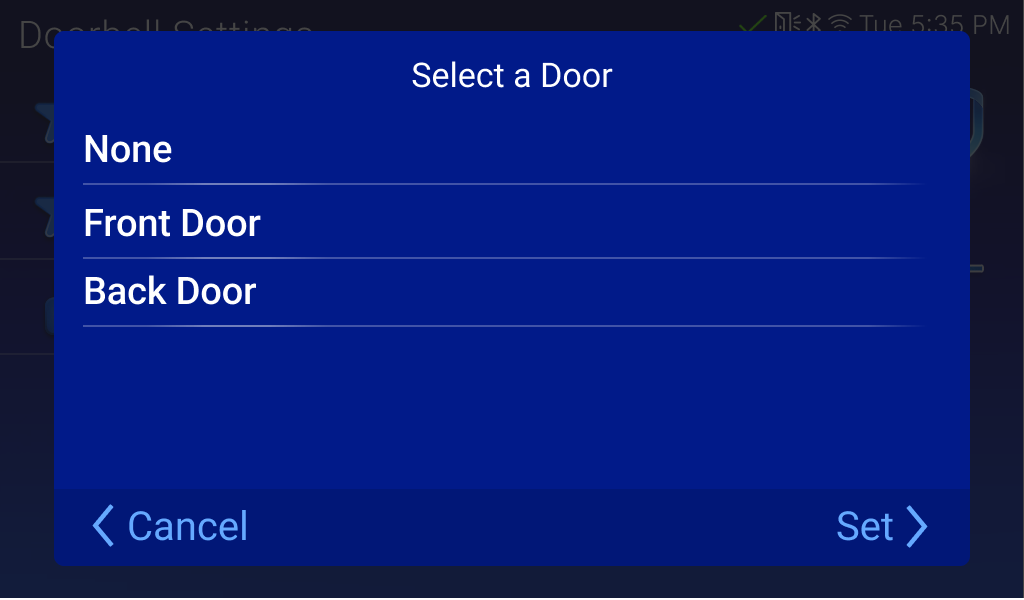
Select Select Door to enable the door lock. The Select a Door pop-up appears, displaying a list of doors.
-
Select the door you want to lock and unlock from the Door Lock button on the doorbell screen.
-
Select Set.
-
Select the back arrow to return to the doorbell screen.