8863 7-Inch Touchscreen Keypads offer an easy-to-use touchscreen interface with an on-board camera, optional panic keys, an internal speaker, an on-board NFC/proximity card reader designed to read 125KHz proximity credentials, and other features. Keypads can be mounted on a flat surface with appropriate fasteners.
Choose How to Communicate
The 8863 can communicate with the panel through Network Connection, the Keypad Bus, or DMP Wireless.
Network
Wi-Fi
To install and program using network connection, begin at Network (Wi-Fi) Connection Instructions.
Hardwired
To install and program using network connection, begin at Network (Hardwired) Connection Instructions.
Keypad Bus
To install and program using the keypad bus, begin at Keypad Bus Connection Instructions.
DMP Wireless
To install and program using DMP Wireless, begin at DMP Wireless Connection Instructions.
What’s Included
-
One 8863 7-Inch Touchscreen Keypad
-
Hardware pack
What You’ll Need
-
7/64” (2.5mm) drill bit for drywall mounting
-
1/4” (6 mm) drill bit for masonry mounting
-
#2 Phillips screwdriver
Procedure
This guide walks you through the required steps needed to install an 8863 keypad. They are:
-
Update the panel firmware.
-
Program the panel.
-
Install the keypad.
-
Connect to Network.
-
Program the keypad.
-
Train your customer.
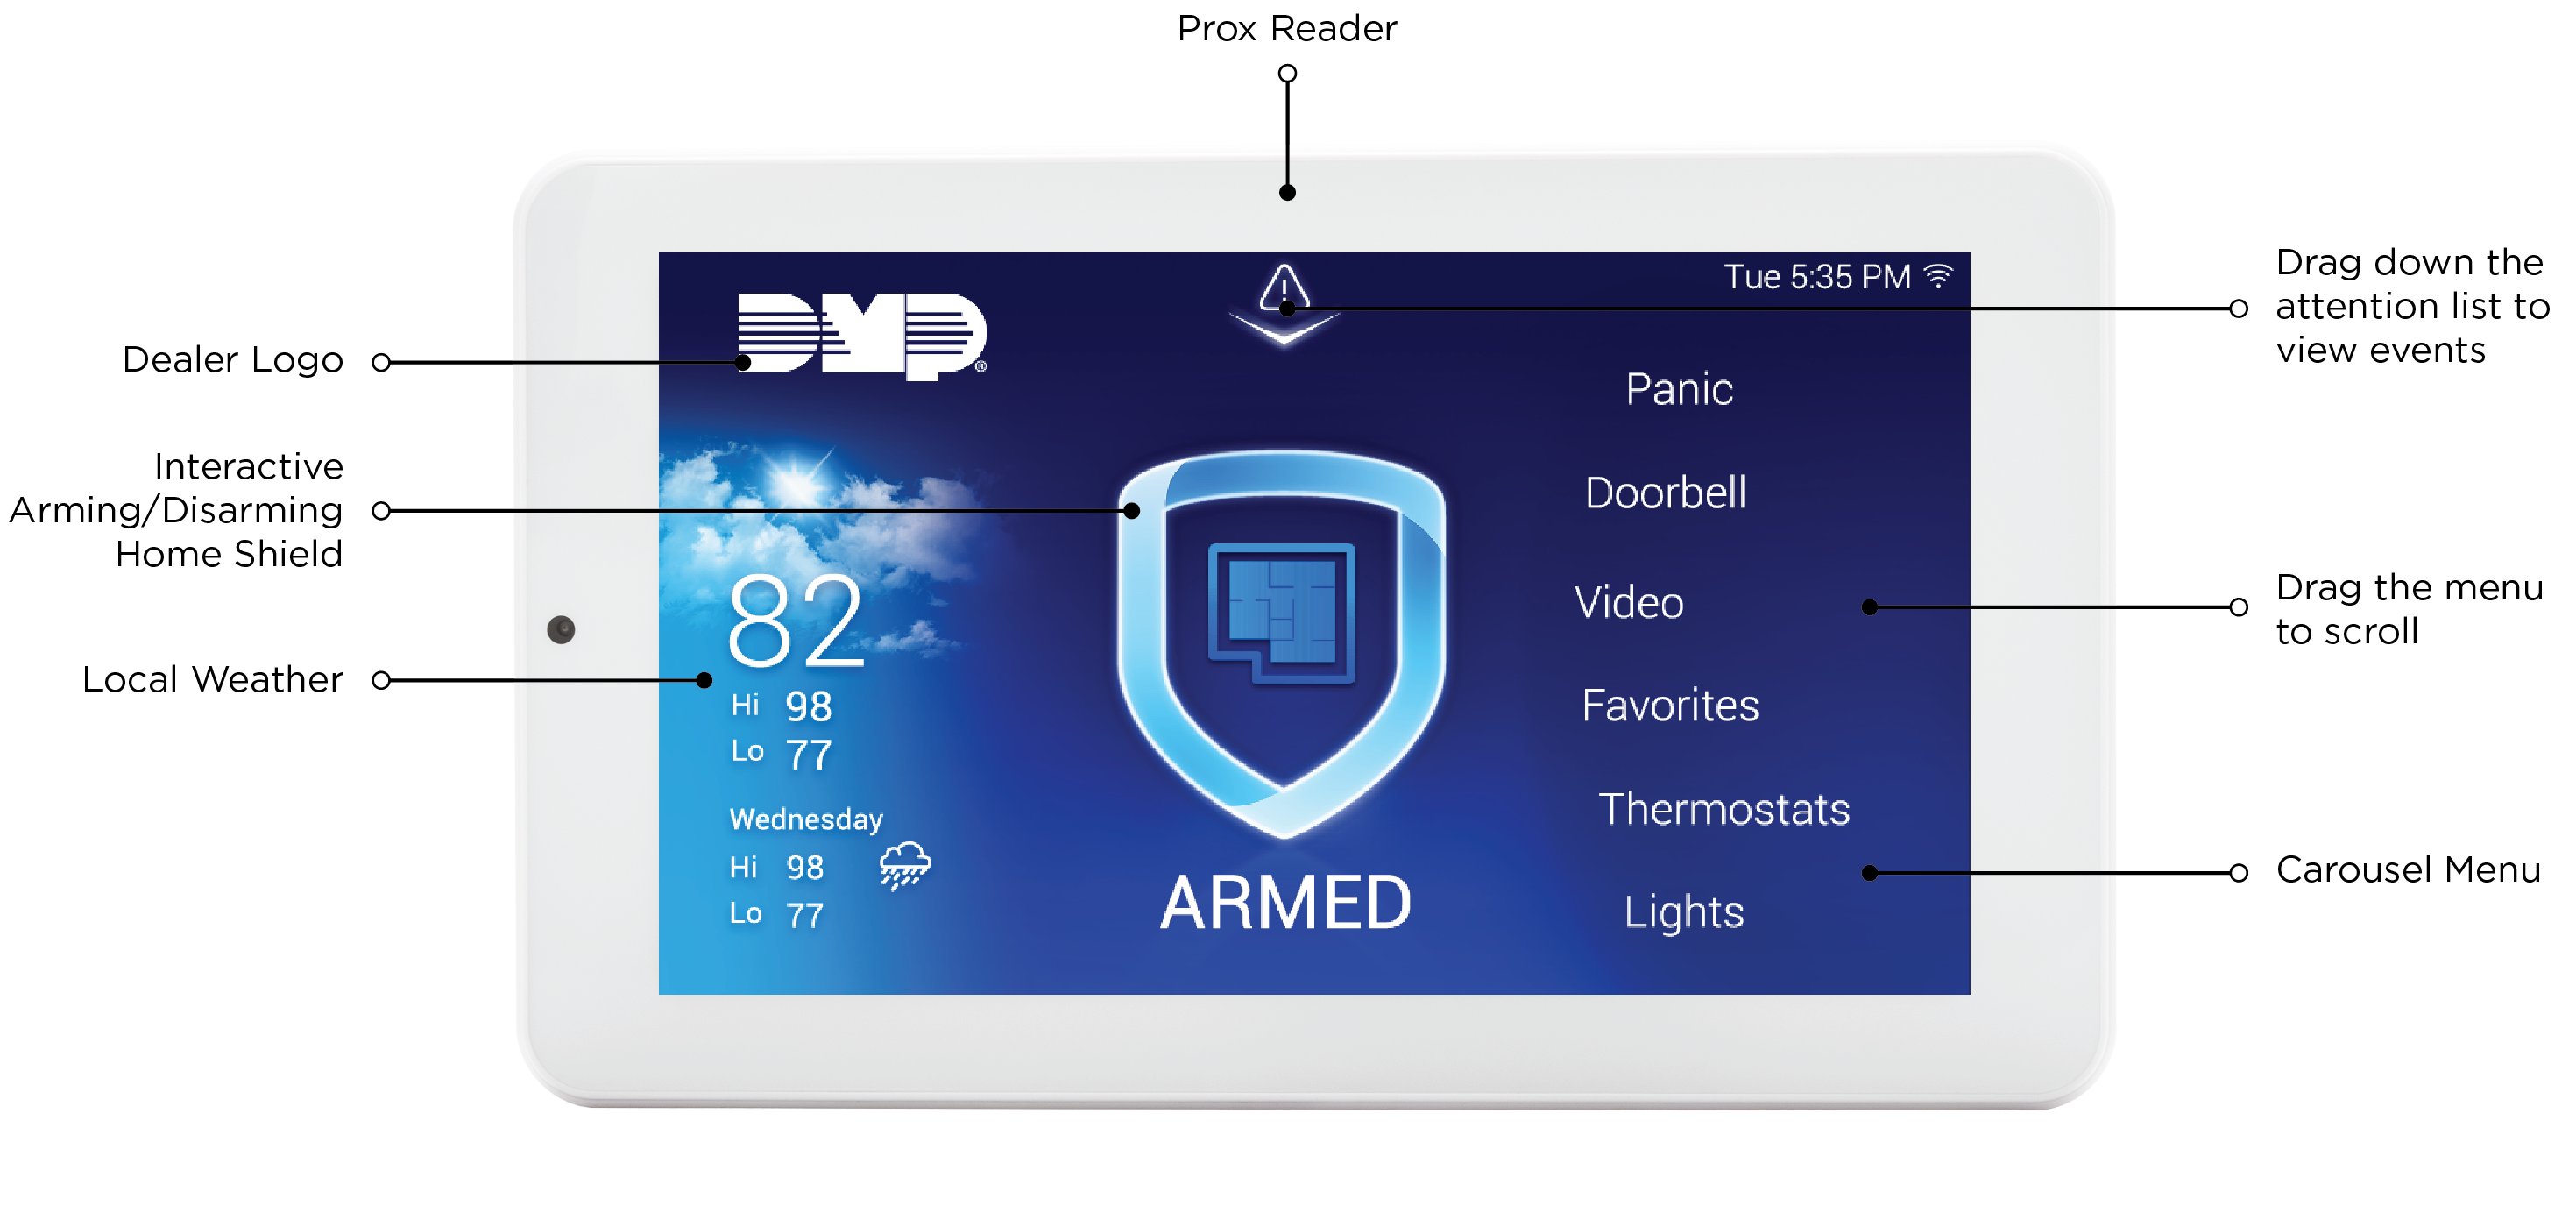
Keypad Layout