This section details features only available on an 8863 when it is connected to network.
Camera Features
Network is required to enable Legacy Cameras (V-4000, V-5000, V-6000 Series) and VUE/VUE Plus Cameras. To learn more about enabling and viewing Legacy Cameras, VUE/VUE Plus Cameras, Legacy Doorbells, and VUE Video Doorbells, and accessing individual features, refer to Video.
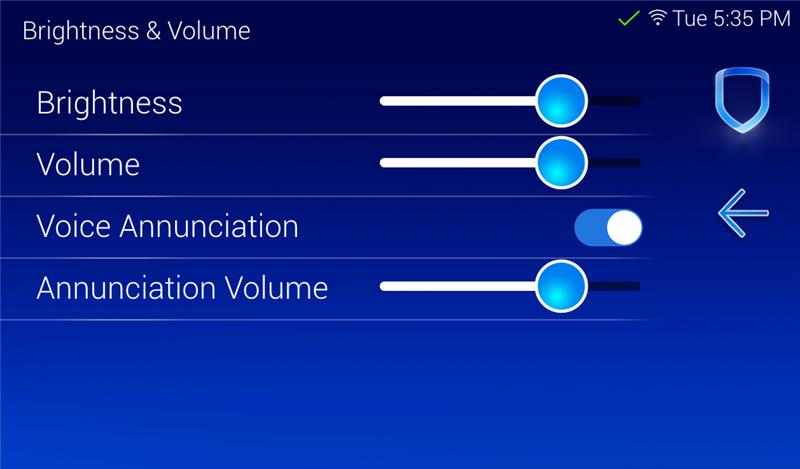
Enable Voice Annunciation
To enable the keypad to annunciate that the pre-defined zone name has been opened when the zone is tripped, use the Voice Annunciation toggle and adjust the volume with the slider in the Display & Sound settings menu.
Pre-Defined Zone Name List
If a zone name does not match one of the pre-defined names in the categories below, the keypad annunciates the zone number and appropriate message. Ensure all zone names are spelled correctly and have proper spacing in between words. 24-Hour and Day zone types do not support this feature.
Pre-Defined Door Names
|
B |
|
|
D |
|
|
E |
|
|
F |
|
|
G |
|
|
K |
|
|
L |
|
|
M |
|
|
N |
|
|
O |
|
|
P |
|
|
R |
|
|
S |
|
|
V |
|
|
W |
|
Pre-Defined Window Names
|
B |
|
|
D |
|
|
F |
|
|
G |
|
|
K |
|
|
L |
|
|
M |
|
|
O |
|
|
S |
|
Pre-Defined Motion Names
|
B |
|
|
D |
|
|
E |
|
|
F |
|
|
G |
|
|
H |
|
|
K |
|
|
L |
|
|
M |
|
|
N |
|
|
O |
|
|
P |
|
|
R |
|
|
S |
|
|
T |
|
|
U |
|
|
V |
|
|
W |
|
|
# |
|
Miscellaneous Pre-Defined Zone Names
|
C |
|
|
D |
|
|
F |
|
|
G |
|
|
K |
|
|
L |
|
|
M |
|
|
N |
|
|
O |
|
|
R |
|
|
S |
|
|
U |
|
|
V |
|
|
W |
|
Upload a Logo and Dealer Information
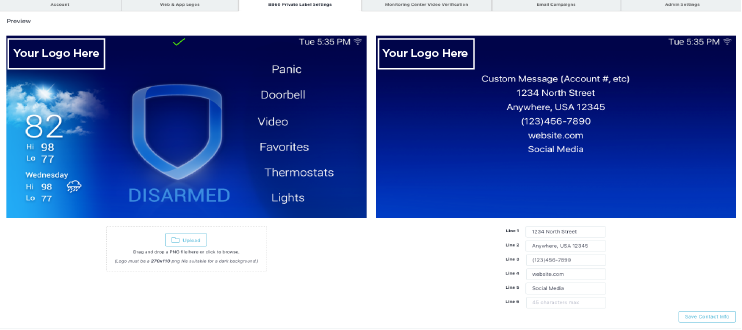
To upload a logo to a 7-Inch Touchscreen Keypad, complete the following steps:
-
Navigate to Dealer Admin (dealer.securecomwireless.com)
-
In the left-hand menu, go to Settings > Dealer.
-
Select 8860 Private Label Settings.
-
Select Upload. A file upload dialog opens.
-
For best results, logos should be a 270 x 110 pixel PNG file with a transparent background. Select the logo that you want to upload and select Open.
-
Type in the dealer information you want to display on the keypad.
-
Select Save Contact Info.
Note: If the logo is not downloading to the keypad, confirm that the panel date and time are correct, then press the DMP logo on the keypad. This triggers the keypad to reach out to Dealer Admin for the new logo.